


 as the Best Mobile App Development Company in 2025")


How to Upload App to the Apple Store
Digital Landscape is evolving at a very fast pace and thus mobile apps have become quite an important part of our lives.
There are several apps available for download on the App Store. So, developers must understand the details about how the app created by them would be published on the app store.
You should also understand that Apple regularly keeps on updating its requirements, policies, and practices. Hence, it is important that app creators are completely informed and accordingly adapt to the situation.
How to Upload App to Apple Store: A Quick Overview
-
Step 1: Creating an Apple ID
-
Step 2: Signing up for the Apple Developer Program
-
Step 3: Accessing App Store Connect
-
Step 4: Getting Your App Ready for the Submission Process
-
Step 5: Creating an App Store Listing
-
Step 6 – Upload the App Store Previews and Screenshots
-
Step 7: Uploading Your App Using Xcode
-
Step 8: Submitting Your App for Review
-
Things to Keep in Mind Before You Upload Your App to the Apple Store
-
Reasons Your App Might Get Rejected from the Apple Store
So, in this article, we will discuss the complete process of how to upload your app to the Apple Store. Let’s dive into it: –
How to Upload App to Apple Store: Step-by-Step Complete Guide
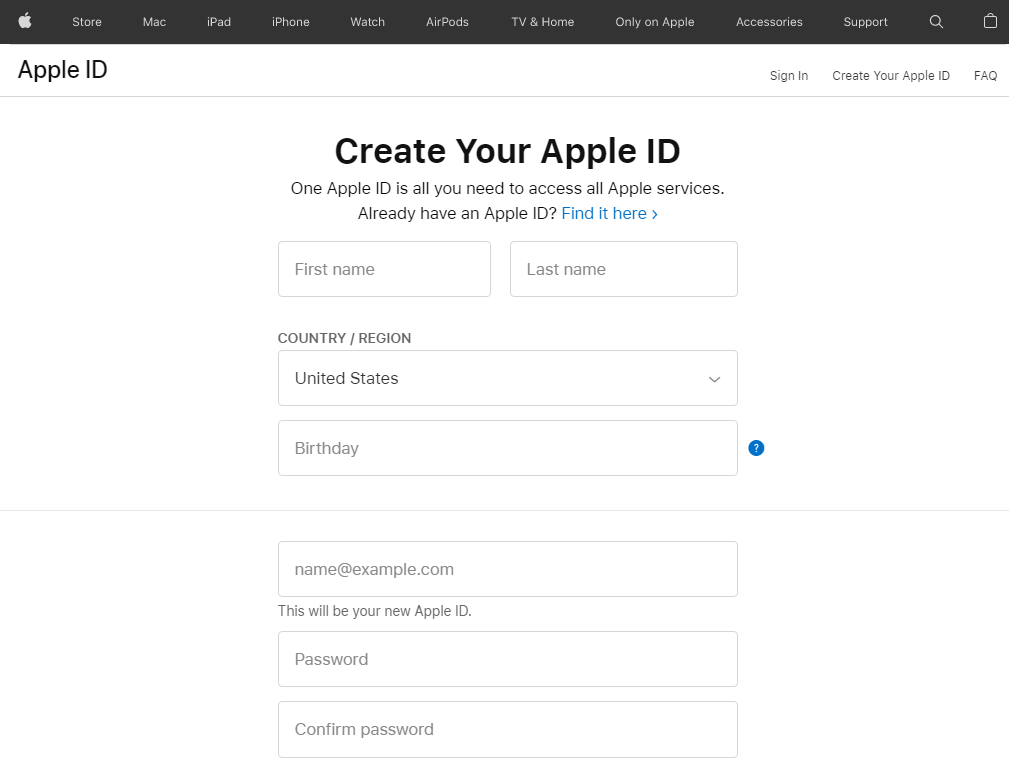
Step 1 – Creating Apple ID
Before you upload your app to the app store, an Apple ID must be created. Through your Apple ID, you can easily access all the information that is provided by Apple.
Step 2 – Sign Up for Apple Developer Program
The next thing that you need to do before you upload your app to the Apple Store is perhaps sign up for the Apple Developer Program. You can easily sign up for the Apple developer program through Apple ID. Some of the advantages of the Apple Developer Program are: –
- Resources & tools would be provided for developing the app
- Beta Software access would be given
- Tools would be provided for app testing
- Technical support would be given by the team of experts
Analytics tools would be available for the application
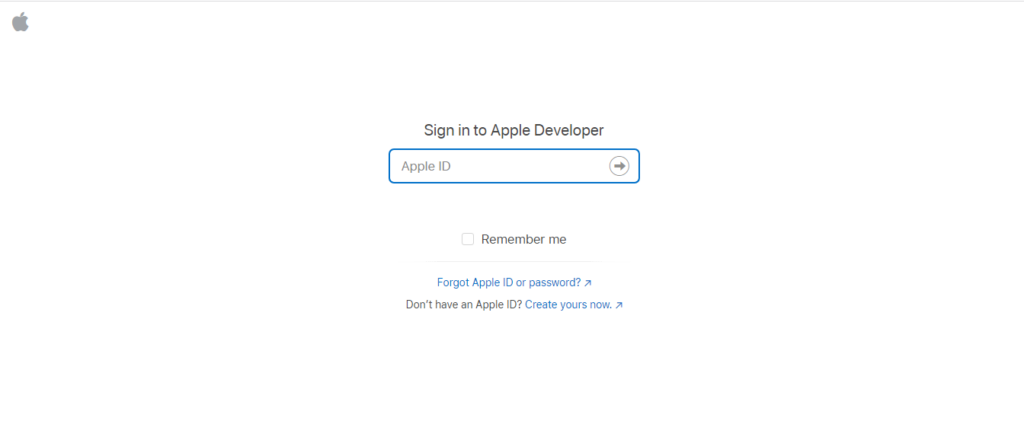
Step 3 – Access App Store Connect
App Store Connect is a website where you can manage everything about your app in the app store. So, App Store Connect can be easily logged in with the assistance of Apple ID.

Step 4 – Get the App Ready for the Submission Process
Before you upload your app to the Apple Store, you have to go through the app certification process.
In this process, your app is reviewed as per the guidelines of App Store Review.
So, it is recommended that you check the documents and follow all the guidelines which have been mentioned.
Besides this, you need to make sure that the app you are developing is perhaps free from any kind of error.
On the contrary, if errors are found in the app, then there is a high probability that your app might get rejected.
One more thing that you need to do is perform proper testing. This should be done in a wide range of conditions which includes low storage, network, and old devices to name a few.
Besides this, you can also get assistance from your family & friends when it comes to the testing of the app.
Step 5 – App Store Listing needs to be Created
Some of the steps that you need to follow for an app store listing are as follows: –
- Sign in to App Store Connect
- After this, from the dashboard section, select My Apps Section
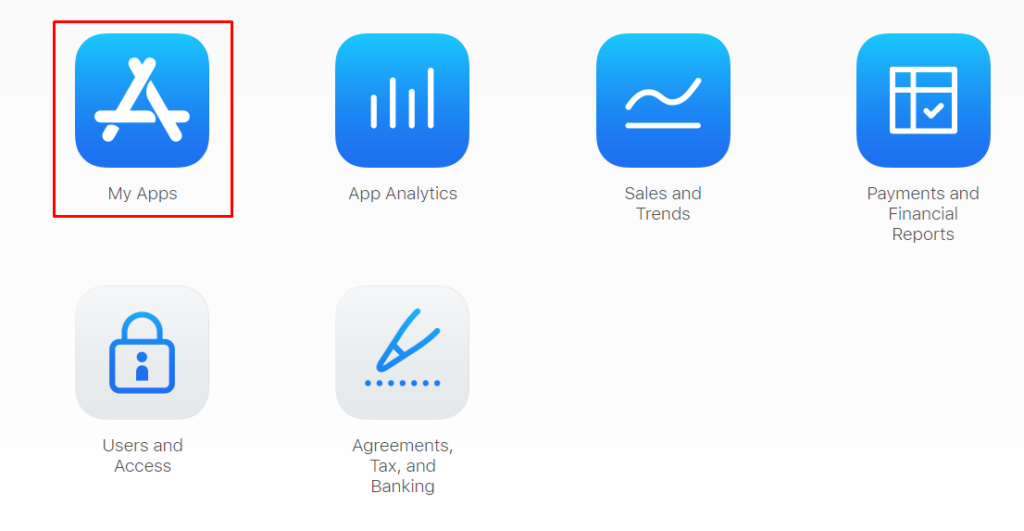
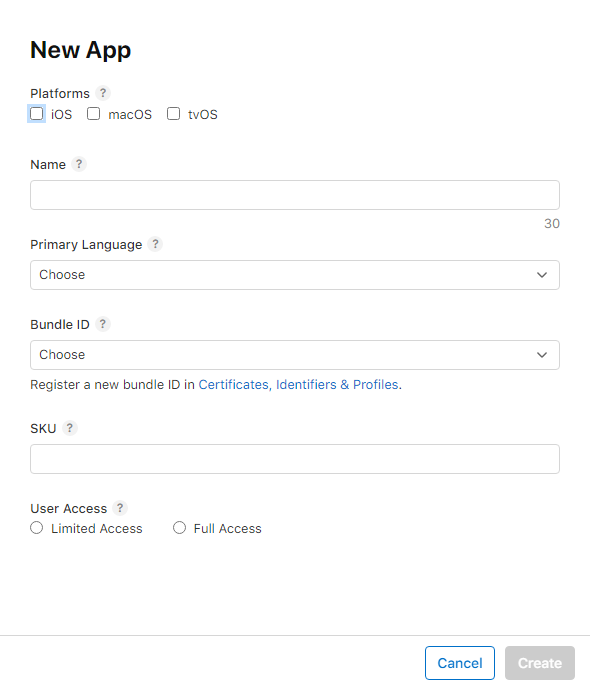
- After this, click on the + sign which is available in the upper left corner, and choose New App

- Next, you need to select the platform on which the app would be made. Other information regarding your app needs to be filled in as well which includes language, name, ID, bundle, user access, etc. Once all of these are done, click on the Create option.
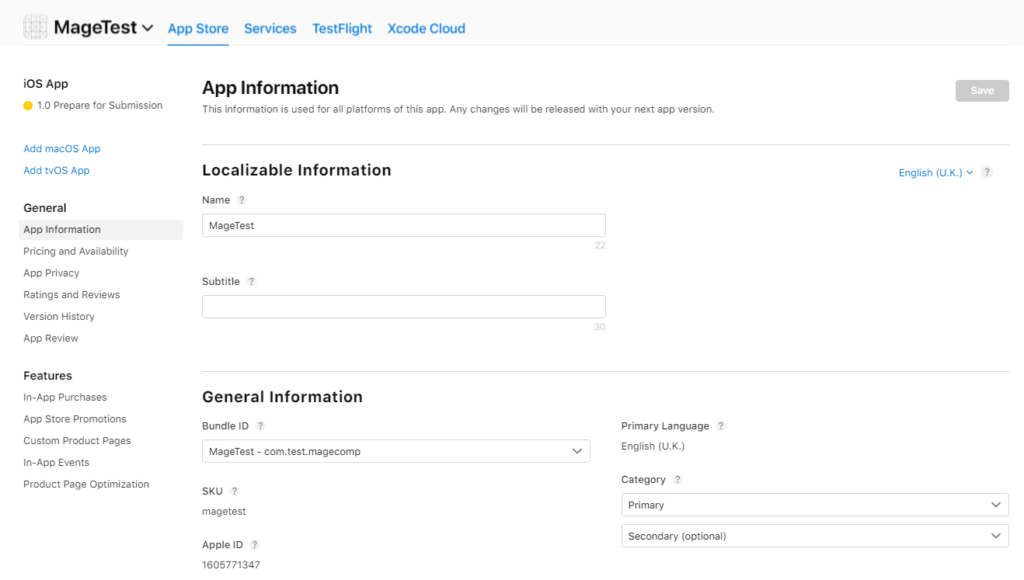
- After this, you need to select the information about the app which is available on the left panel. Further, general and localized information regarding the app needs to be added which includes category and subtitle.
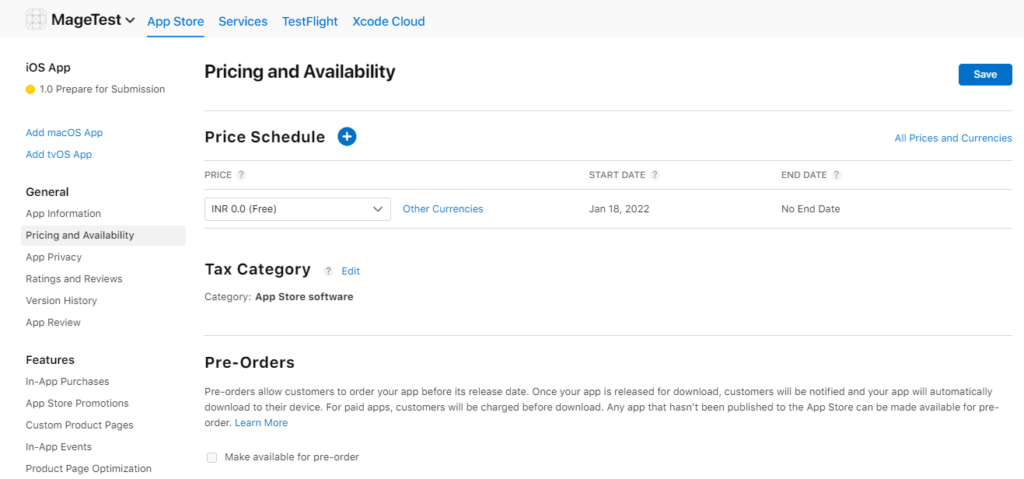
- Further, from the left panel, you need to select the availability and pricing options. Thus, the app pricing as well as other details need to be defined.
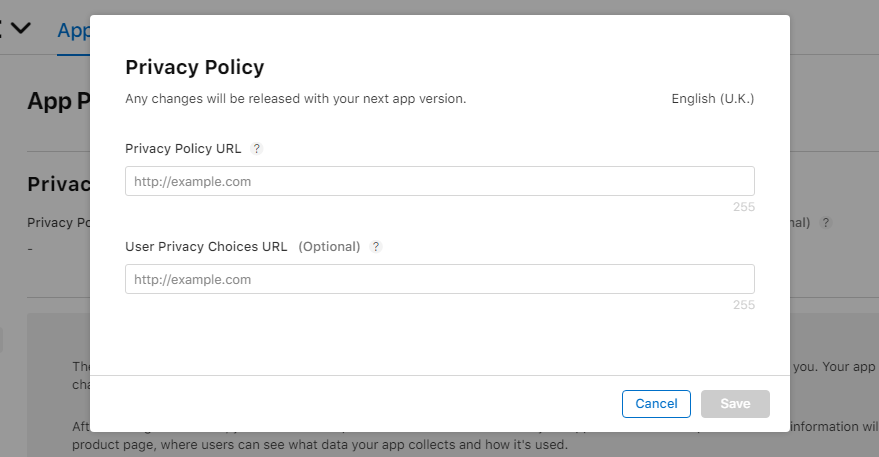
- Next, you need to add information regarding the App Privacy. Moreover, you have to give details about the URL of the privacy policy. A privacy policy generator can very well assist you in such a regard.
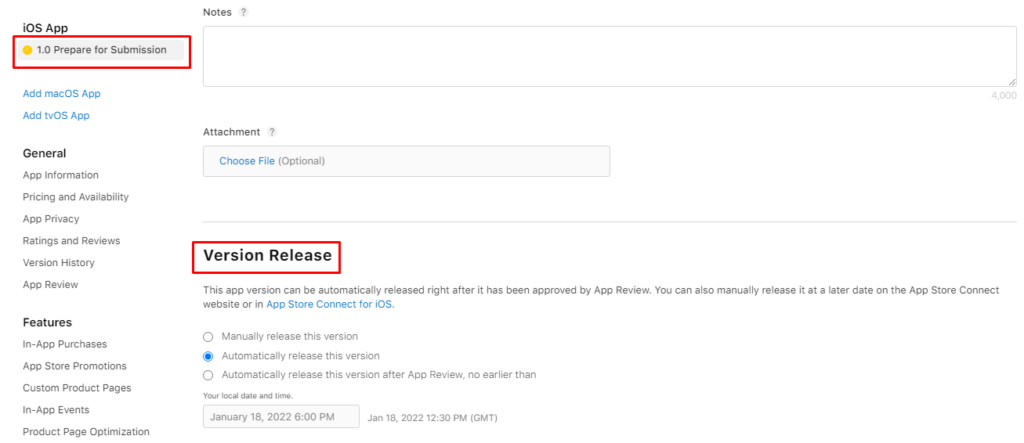
- Lastly, you need to select the submission option available in the left pane. After this, from the section on version release, select how the app would be released.
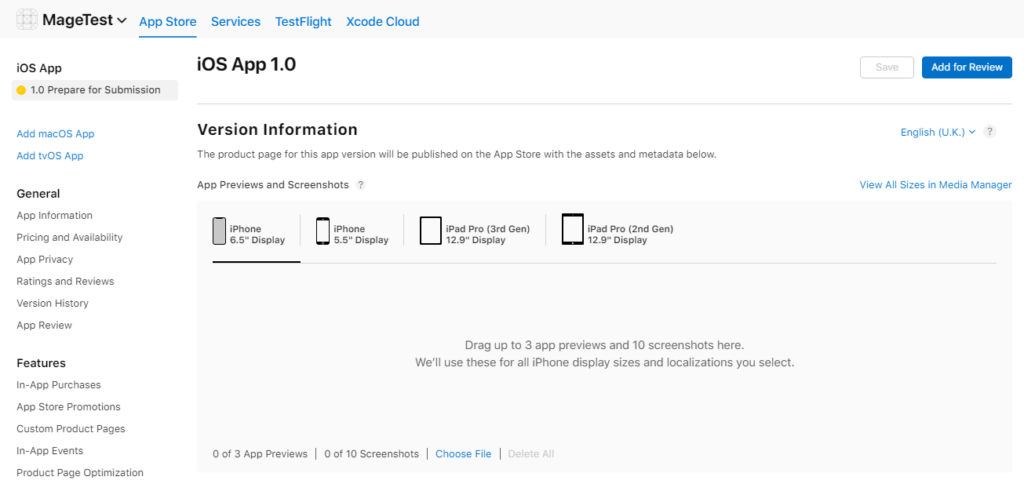
Step 6 – Upload the App Store Previews and Screenshots
You must connect with your target users with the help of videos and images. For the following purpose, the App Store gives you the option to add screenshots and previews.
It is recommended that you go through the specification that has been mentioned by the app store such that the chances of the app being rejected is reduced. You can add the screenshots and previews for 4 different sizes. Further, 10 screenshots and 3 App Previews can be used for each of the display.
Step 7 – Upload App Using Xcode
It is recommended that you don’t opt for this step till you find that the app is bug-free. The reason is that if that app is not bug-free, then approval won’t happen in the App Store.
So, if you are coming up with new apps, then the Xcode 1.0.0 version should be set. Through the following version, the process of publishing becomes quite easy.
Earlier, a lot of steps were needed when it came to publishing, but now it can be done with just a few clicks.
To start, full app achievement needs to be created. After this, check the simulators list in Xcode and select the Generic IOS device from the menu that is present. Next, the Archive option needs to be selected.
In this way, your app would be bundled. So, based on the size, it will take some time.
Once the following process is finished, then click on the distribute app option. Lastly, select the iOS App Store when prompted for the distribution method.
Once the upload is successful, you will get a confirmation message on the screen.
Step 8 – Submit the App for Review
It is perhaps the last step when it comes to uploading your app to the Apple Store. Once you click on the save button, the app will be submitted for review purposes. After that, you need to wait for the approval for the App.
The review process can take up to a few days. Once the approval happens, then you will be notified about the same in the email.
Lastly, with the assistance of App Store Connect, you can know about the sales, downloads, ratings, and a lot more things.
Things you Need to keep in mind before you upload the App to Apple Store
-
Align the App to Your Account
If you want to upload the app to the Apple store, then the first thing that you need to do is perhaps align the app to an Apple developer account. After this, the app can be sent for review.
A good app development team such as Mobulous can very well assist you in getting the certificate ready.
-
Try Promotional Materials
If you are building an app, then that target audience must be attracted.
So, some of the things you need to do are prepare the app description, name, promotional texts, and screenshots.
Further, if the app is available in a wide range of languages, then the materials must be localized.
-
Legal Requirements Should Be Fulfilled
Apple pays a lot of attention when it comes to the data of the user.
Other than this, the app you are developing should fulfill the legal requirements of the country in which you are particularly targeting.
Another thing that you need to keep in mind is that the content present in your app should be licensed. If not, then the app might be removed from the app store.
-
Check Out Guidelines
Apple has certain guidelines that are put into place which include detailed information about the app.
After a certain time, the App Store keeps on changing the requirements. Hence, you must check the requirements before the app is submitted.
In this way, all the important details won’t be missed out.
Reasons Your App Might Get Rejected from the Apple Store
-
Inconsistent UX and UI
In general, Apple tends to have very strict guidelines when it comes to uploading apps. So, if the guidelines are flaunted, then the app can get rejected. Thus, you should study Human Interface Guidelines in detail to know about the essential interface.
-
Crashes and Bugs
When the app is submitted for review, you need to make sure that crashes and bugs don’t come up in the process during review. We at Mobulous Technologies can test the app for you and make sure that the performance offered is flawless.
-
User Data Access
If you are making an app that needs access to several aspects such as location, contacts, and photos, then you need to point out the same to the Apple Review Team. You need to make them believe that user data is not being stolen by the app.
-
Features
Another reason the app is rejected is because not enough features are present in the app that can add value. Thus, before you publish the app, compare it with the other apps that are available in your particular category.
-
Multiple app submissions of the same type
There is a high probability that your app might get rejected if several submission of the same type is done. In such a case, a good quality product should be made and submitted.
Conclusion
Above are the steps through which you can upload your app to the Apple Store. If you follow the steps that have been mentioned, then you can easily be able to upload. In case of any issues, do let us know in the comment section.
Lastly, if you are looking for iOS App Development, then Mobulous Technologies can be one of the best choices for you.
Visit Mobulous for Mobile App Development Services
Mail : sales@mobulous.com Phone
 : +91-9650100411


